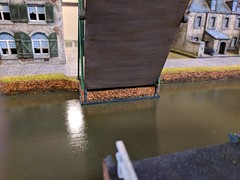
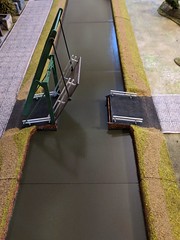
Ever since Too Fat Lardies released their Blitzkrieg 1940 Handbook for Chain of Command I’ve been working mostly on Early War projects. I had wanted to do something with this Sarissa canal bridge and after seeing how the owner of my FLGS built his canal for a Battle of Mons game I decided to adopt some of his techniques and build my own.
I don’t have the inclination, nor the room, to make dedicated terrain boards so like everything else the canal was going to have to be modular and easy to store. As my gaming mats are 60″ wide I decided to make 5 sections, each 12″ x 12″.
I used panels of Ampersand hardboard and airbrushed several colors of green for the water and then applied three coats of Minwax acrylic gloss varnish using a foam brush. For the canal walls I used Pine Ranch Casing that I picked up at Lowes. This was cut into 12″ lengths (except for the bridge section) and airbrushed with some brown. For the walls I used some brick texture paper that was given to me by a friend. It was cut into strips and affixed with carpenter’s glue. This was finished off with a wash of Vallejo Sepia and some Secret Weapon Algae where it met the water. The completed walls were then glued to the panels with carpenter’s glue.
Next I assembled the bridge and added some fine sand on the surface of the ramps. This was then primed and painted, and I added more brick paper on the horizontal surfaces. Before cutting the canal wall pieces I placed and marked out where the bridge would go. Then I cut the short pieces of casing and finished them the same way as the others. I didn’t get any pictures of it, but the bottom “base” of the bridge had a connecting piece to make it a one piece affair and help align the ramps when opening and closing it. I had taken a leap of faith and removed it while finishing the bridge, hoping that I could align the pieces well enough when I affixed them. I attached the bridge to the canal board using carpenter’s glue and set it aside to dry. Spoiler alert – it worked.
To finish off the bridge piece, I fashioned some connecting wall pieces using card stock and the ever versatile brick paper. These were affixed to the board, and then the remaining space was filled with air-dry clay. Once this has set, I added more fine sand and painted it to kinda-sorta blend it in with the ramps. Then I flocked the edges making foot paths on both sides. I may add some detail parts in the future, and I do have some boats to finish, but for now it’s functional.


March 26th, 2019 at 09:37
Great job, that canal looks very peaceful.
LikeLiked by 1 person
March 26th, 2019 at 14:14
Looks amazing.
I am unsurprised.
LikeLiked by 1 person
March 26th, 2019 at 15:52
Great job! When will this be making an appearance?
LikeLiked by 1 person
March 26th, 2019 at 16:31
Thanks! I hope at Pickett’s Lard. If not, Historicon.
LikeLiked by 1 person
March 26th, 2019 at 16:28
Looks great! I have the double lift version of that bridge and I’ve been slowly working out how I wanted to do it. Like you, I didn’t want big terrain board pieces.
LikeLiked by 1 person
March 27th, 2019 at 13:00
Thats a super cool build! I may have to take the challenge. Thanks for sharing your build progress pics.
LikeLiked by 1 person